Over the last year I have done quite a bit of online tutoring, mostly one-on-one lessons in math and programming with students around 13 to 15 years old. Most lessons are one to two hours long and usually with the same students over a longer period of time.
This post is partly a personal reference for myself and partly a collection of tools and tricks I can share with others who tutor online.
The biggest lesson
Online tutoring should not become a private livestream where I solve tasks and the student silently watches.
The student has to stay active. They need to write, explain, try things, make mistakes and notice when something does not make sense.
In person, you often see confusion before the student says anything. Online, you have to design the lesson so confusion becomes visible.
What works well online
The biggest advantage is flexibility. I do not need to travel to the student, so lessons are much easier to schedule. I can tutor from home, reuse digital material and quickly share links, whiteboards or exercises.
The downside is that it is harder to read facial expressions and body language. If a student does not understand something, they might hide it more easily. Because of that, I try to make them explain their thinking much more often.
My favourite teaching trick
After I explain something, I give the student a similar task and say:
Imagine I am a younger student and you have to explain this to me. How would you do it?
Then they try to explain the topic back to me. This quickly shows whether they really understood it or only followed along.
If they make a mistake, I try not to say “wrong”. Instead, I ask questions like:
Would this still work with another number?
Can we check whether this answer makes sense?
Is this a general solution or does it only work here?
The goal is that they notice the gap themselves.
My lesson structure
A typical one-hour lesson looks roughly like this:
- 5 minutes: check-in and overview
- 20 to 25 minutes: working on tasks
- 5 minutes: short break
- 20 minutes: more exercises or a new topic
- final minutes: student summarizes what they learned
I like ending with the student’s own summary. If they can explain what they learned, I get a much better signal than if they only say “yes, I understood”.
My minimum setup
You do not need a fancy setup to start tutoring online. For me, the most important parts are:
- a video call tool like Google Meet, Zoom or Teams
- a shared whiteboard
- a laptop or tablet
- ideally a stylus
- an easy way for the student to open the whiteboard
At the moment, I often use Google Meet for calls and tldraw as a shared whiteboard. tldraw works nicely on my iPad and has low latency. If the student also uses an iPad, it works especially well.
I also like putting a squared paper background into the whiteboard. It keeps the work tidy and makes it feel more like an actual test sheet.
Small tricks that help
One useful trick is using QR codes. For example, I create a share link for the whiteboard, generate a QR code and show it in the call or as an OBS overlay. Then the student can scan it with an iPad instead of typing a long link.
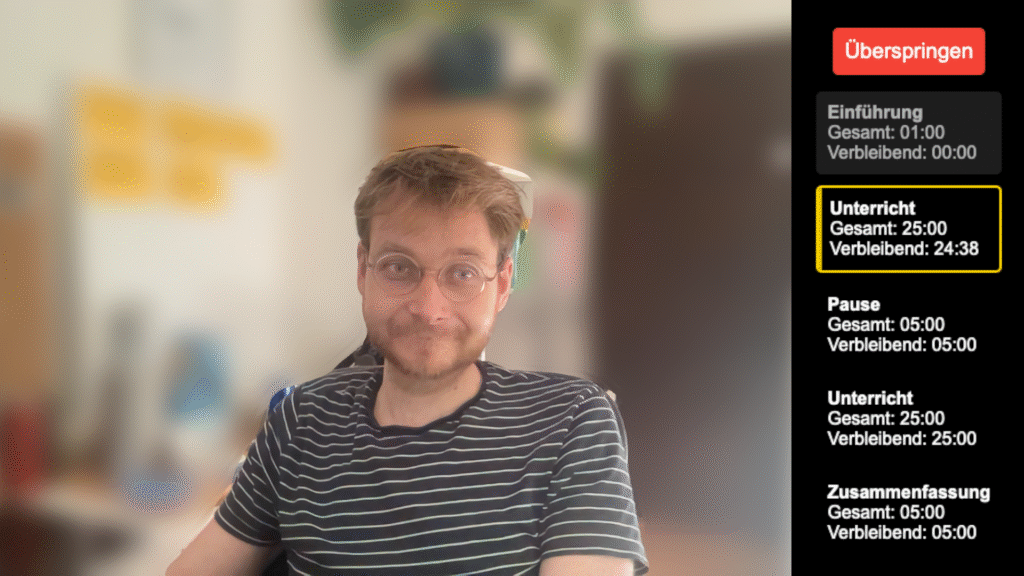
OBS is not necessary, but it can make the lesson feel more polished. I sometimes use it for a webcam overlay, background removal, a lesson overview or QR codes.
ChatGPT is useful as a preparation and follow-up tool. It can help generate additional exercises, summarize a lesson or check a solution path. I still check the output, but for many school-level math and programming tasks it saves time.
Final thought
Online tutoring works best when the technology disappears into the background.
A stable call, a shared whiteboard and a few good questions are often enough. The goal is not to build the fanciest online classroom. The goal is to make the student think, explain, try things, make mistakes safely and notice their own progress.